Thursday, April 23, 2015

Hot Rod Magazine and .... Time to move on

Well it has been a fun journey but all good things must come to an end.
The car was in Hot Rod Magazine and she looked so good.
Thanks to Jamie Bender and J65 Productions for doing a great job of showing off this old girl.
It has always been a dream of mine to have a car in that one and thanks to Jamie and Jeremy, they made it happen.


I know most of these were on one of the other pages but I had to give Jamie his own page.

So... here we are... Hundreds of hours later...Thousands of dollars spent and now it is time to move on.
The next adventure, the next chapter...


It has been a wonderful ride, I look forward to the next project.

maybe??????...

Hummmmmm?????

Thursday, April 19, 2012

Before and after shots

I am going to try and post a few before and after shots of the same specific things.
Here are a few...


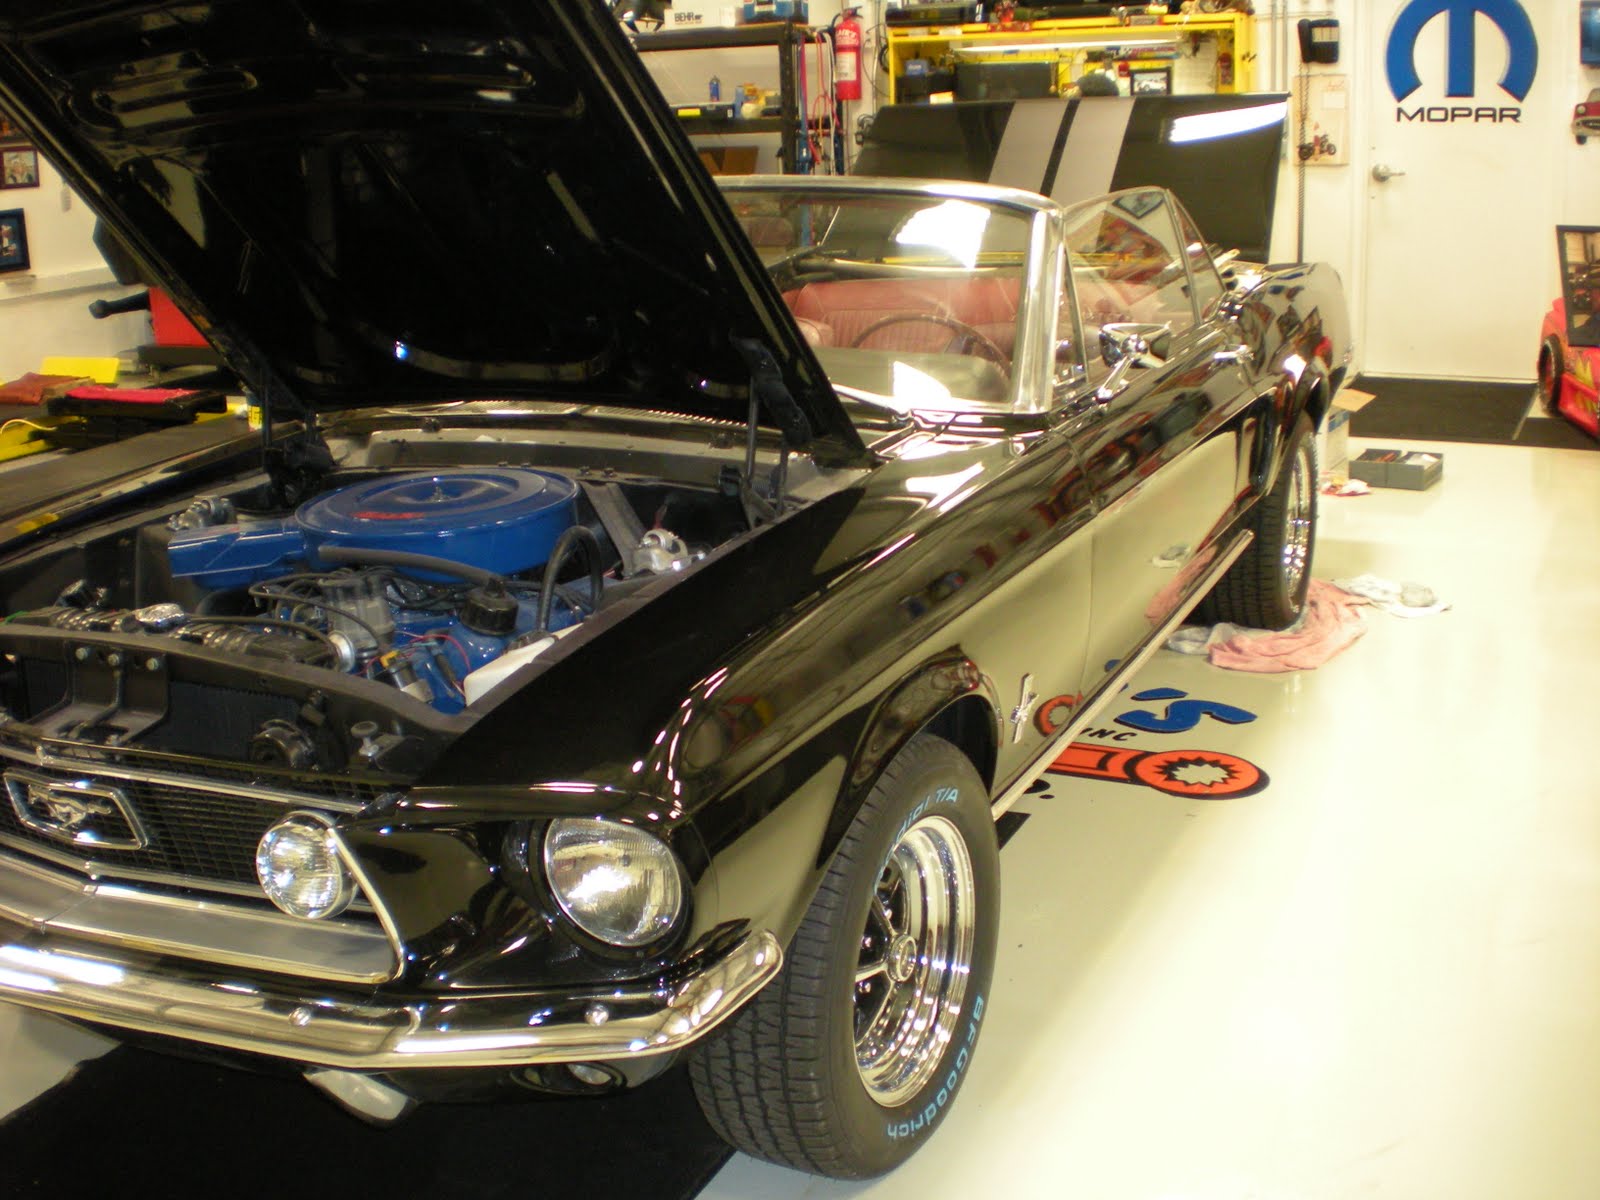
So , I was asked... " what did you end up doing to your car?"
Well...

Motor Additions/modifications/Repairs

De-Grease the entire engine and parts
Machined the Block 30 over
New Pistons and Rings
New Freeze Plugs
Ground and polish the Crank
Heads re-surfaced
New competition valves with Hardened seats
New mild cam
New Cam Bearings
New lifters and rockers
New Battery tray
New Gaskets
New Rods
New Spark Plugs
New Water Pump
New Fuel Pump
New Electronic Distributor
New Coil
New High output Alternator
New Timing Chain
New Flex Plate
New Harmonic Balancer
New Dip Stick
New oil pressure sensor
New oil pan
New thermostat
All new water and vacuum hoses
New Battery and cables
New fuel filter
New Air filter
New voltage regulator
New window washer bottle and sprayer hoses and nozzles
Complete restore/rebuild of the carburetor
New Headers and custom dual exhaust system with chrome ends
New master bake cylinder
Paint and detail the engine parts and the entire engine compartment.
Add original factor stickers
New Starter (4-2015)
New Starter Solenoid (4-2015)

Transmission Additions / Modifications /Repairs
De-grease and paint exterior of transmission
Complete re-build and seal replacement
Add New B&M shift kit
New heavy duty pump
New Torque converter
New speedometer gear
New vacuum modulator
New speedometer cable
New 380 rear end gears
New Chrome Pan 

Interior Additions / Modifications / Repairs
New Rugs
New Floor Matts
New door panels
New window regulators
New interior door handles
Add New high density sound deadening treatments
New stereo speakers
Repaint kick panels, dash, doors, and rear interior side trim
New power top piston
New door threshold covers
New steering wheel
New directional switch
New fog light switch
New firewall insulation
New heater control cables
New heater core seals
New door lock knobs
New rear view mirror bracket
New front and rear seat belts 

Body, sheet metal, and frame work Additions / Modifications/ Repairs
Replaced right front quarter panel bottom
Replaced floor pans ( driver and passenger, front and back)
Replaced torque boxes
Replaced inner frame rails
Replaced the firewall extensions
Replaced the pillar braces
Replaced the rear seat braces
Replaced the seat supports
Replaced inner fender headlight guards
Replaced metal fuel line
New tires, rims and lugs and hub covers
New front control lower control arms and ball joints
New front and rear shocks
New rear tail light bezels
New Fog lights
New rear back-up lights
New rear bumper
New bumper bushings
New front fender badges
New truck letters “ M U S T A N G “
New trunk liner
New outer rocker trim
New rear fender extension trim
New door handles
New rear fender window trim
New stainless steel hood pins with tethers
New radio antenna
New side view mirror
New windshield wipers
New door switch sensors
New paint job with stripe
New heater core gaskets
 
Not all of these things were done during this "whirl-wind" restore.
These are the things I have done since we purchased the car.

Tuesday, April 17, 2012

A year ( or so) later


 Well, many things have happened since that faithful day of the revel. I have done more to the car and I need to add those things to the record.
The one thing that I did was to add hood pins. Not a hard job but scary.

Jeremy and I ran tape on the inside of the engine compartment and extended it along the top of the front support rail out onto the top of each fender. Than we added the tape to the top of the hood so we knew where the support brace was under the hood. Then I found a few pictures of some Shelby's that had pins and gave it me best guess as the the location in from the edge of the hood.


I also switched the rear gears. I went from the stock 2.79 to 3.80.
Well that was a mistake. For the type of driving that Denise and I will be doing, I should have picked a smaller ratio. Maybe 3.25 or 3.55.
I have converted back to the original rear. I will keep that untill I am able to convert the transmission to a T5.

I also added a woodgrain steering wheel . That was pretty easy and looks great.


I also installed an electronic ignition.
THAT WAS THE BEST UPGRADE I COULD HAVE DONE! There was more power and a smoother idle.

Follow up to a follow up…
Most of the time I don’t bother complaining but once in a while I get so frustrated that I have to say something with the hopes of saving someone else a major headache.
 I was very excited about making the change to an electronic distributor without points and condenser. The upgrade itself will never be regretted.
Unfortunately I can’t say that about the retailer that I chose to purchase it from.
A year ago I made the decision to convert the original distributor and called CJ Pony parts to make the purchase. I gave them the engine specs and THEY recommended the proper distributor and coil for my upgrade. I trusted they knew what they were doing.
After a year of issues that could not be traced, including stranding Denise, I spoke to the tech support at PerTronix. Carl was the best. He was able to isolate my problem with two questions. What I did not know and obviously CJ Pony parts did not know either is that the coil and the distributor need to be matched to be correct. CJ Pony parts sold me the wrong coil. But that is not the problem. Mistakes happen. I see the real problem being CJ Pony Parts unwillingness to fix the problem as the real issue here. Even after their mistake, they were unwilling to exchange the wrong coil with the correct one. All this after spending thousands of dollars with them through the restoration and even after writing a letter to them explaining the entire situation.  It just seemed like my patronage was unimportant to them.
Luckily, PreTronix is concerned about their clients. Carl made the decision to replace the wrong coil with the correct one, at no cost. I see this as going above and beyond. It was not only kind but is the kind of gesture that will insure my trust and loyalty to a company.
Bottom line…It appears that CJ Pony parts is more concerned with the sale then with caring for their customers.
To go one further... the wrong parts were the direct reason for an expensive breakdown. We were traveling out of state when the car died. After an expensive tow, we were told the wrong timing gear was used with this distributor. AGAIN, this was the result of the wrong item being supplied by CJ Pony Parts.


I am profoundly disappointed in them and will not be using them ever again.
__________________________________________________________________________

I went back and re-gluded the rocker trim that I put on. Remember I said that there were some things that I really felt had been reproduced cheaply? That was one of those things.


I also fabricated a radiator overflow bottle. I did not want any of the overflow antifreeze to be getting on the motor or the new paint so I found a solution. The reason it was needed is because I am running with the timing advanced slightly. Doing that seems to cause the motor to run a bit hotter than before.


Here is a few of the finished product.


Wednesday, January 5, 2011

January 5, 2011 The Reveal

Well , I never thought the day would come. We showed up at Blair's to await Denise who was on her way back from College Park with one of my little helpers.
Becca was stuck stalling Mom until I could assemble the folks who helped make all this happen , at the shop.
I quick impromptu visit to Grandma's and a little belly ace helped stretch the time it took to get home. It gave us enough time to dust the car one more time.


Dani did a great job getting it ready.


Hard to believe we actually surprised her.

It is hard to sum up all the Thanks that are due but...
Jeff Boswell...Thanks for a great Primer shoot and teaching me how to get these kinds of results
Leo and Brian...Thanks for a great place to work on the car and preform the nastiest part of the job in a great environment and carting the car back and forth to Plaza Ford.
Jeremy...Thanks for the GREAT paint selection and the prep help.
Jeff, John, Larry and Tom Walls (Plaza Ford) ...For a great paint job.
Dani and Becca for running blocker for me when Mom wanted to know where I was all the time.
Eddy for the engine work
Ramsey Muffler for the exhaust system
Most of all - Lisa and Mark Blair ( Blair's Auto Care ) I can not even start to put my hands around all the time you invested and the resources that you spent to make this happen. It was your idea to do it ( so it is all your fault!)...I would have never tried this without you and I could not have finished it either. You are great friends. A bit crazy...but great

It is done. Happy Birthday Dee.

January 5, 2011 Detailing with Dani

Clean up night. Danielle went with me to detail the car while I did a few final things.
There will be more after Dee gets the car back but it will be at my pace.

The after market scripts and the emblems were a pain in the butt. The fasteners do not work very well. The originals had bolts on the back to fasten them. These came with the expanders that go into the hole with the post. That was not working well and the emblems and scripts did not have the contour of the fender. I ended up using the 3m trim cement and it worked fine. I found out that is what a lot of the body shops use now. I did not grind off the posts. I used them to help secure them.


Dani cleaned the sealer of the lettering. I love the way the wheels look. She also cleaned the trunk and interior. She detail the engine and then was stuck moping the floor when we got done. We tried not to make a mess. Lisa spent time cleaning up the shop today and it looked great.


The rocker trim was another after market accessory that could have been made better. The clips are poorly designed. I will have to go back after and find a better way to secure them. The top of the clip shows above the trim itself. I would rather pay more and have a nicer product then to have something cheep. You get what you pay for.


All she needs is a big red bow.

Tuesday, January 4, 2011

January 3, 2011 Back to Blair's

Well, we are back at Blair's. There is a lot of detailing to do.
Dani has offered to help.
I also have a short punch list of things left to do then I can be done with it...for now.


After a project like this , you always have things that you wish you would have done or things that could have been done differently. Notice I did not say "done better" ?


It is good as its going to get with my wallet and time budget. I think she is going to enjoy it.
At least, I hope so.